In Celebration of Good Record Keeping

This is not the most exciting blog title I’ve ever come up with but it’s important to teach students how to keep records, especially when collecting lab results that will be used to write a report. In my previous entry, I discussed our involvement in One Brave Idea, which could provide our students with an opportunity to present lab results in an ongoing pAcne study to experts in the field of cardiovascular and microbiome health. Many students were excited by this and wanted to put their best foot forward to impress the scientists but there was something crucial that needed to be taught regarding record-keeping.

When students hand in work, I tend to notice that a fair number of them don’t include pictures they took during the experiment. I know they took them but I realized that they weren’t sure how to keep them readily accessible a week or a month after the experiment. This initially surprised me. After all, how many pictures do we have on our phones at the ready to be shown to others? On the other hand, how many times have you tried to access a specific one to show someone and found yourself aimlessly swiping across your photo roll, only to give up and sigh, “it’s in there somewhere.” If you’re like me, quite a few, so it’s reasonable to assume students would struggle with this problem too. So onwards began our thrilling unit on record keeping!

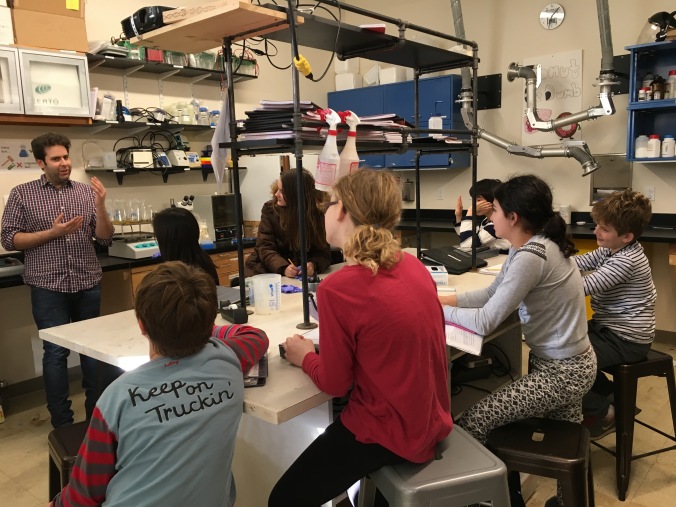
I started our discussion like an infomercial by saying, “Has this every happened to you: You take a picture of a lab result, look at it proudly and think, ‘this is a good picture. I’m going to use it in the lab report.’ But then during the writing process, the picture is gone, replaced by countless others leaving you high and dry?” Virtually every student nodded their hands and a couple started laughing as they did so. Even kids who had phones on them still lost pictures because they have never had to catalog them.

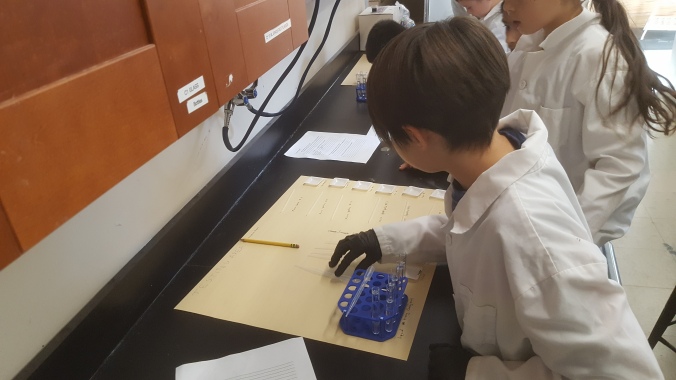
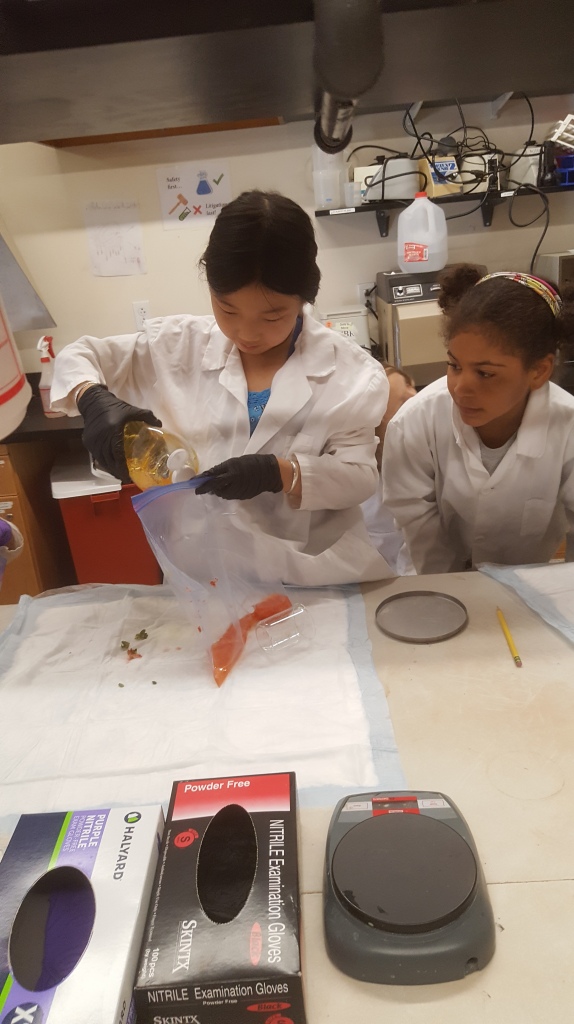
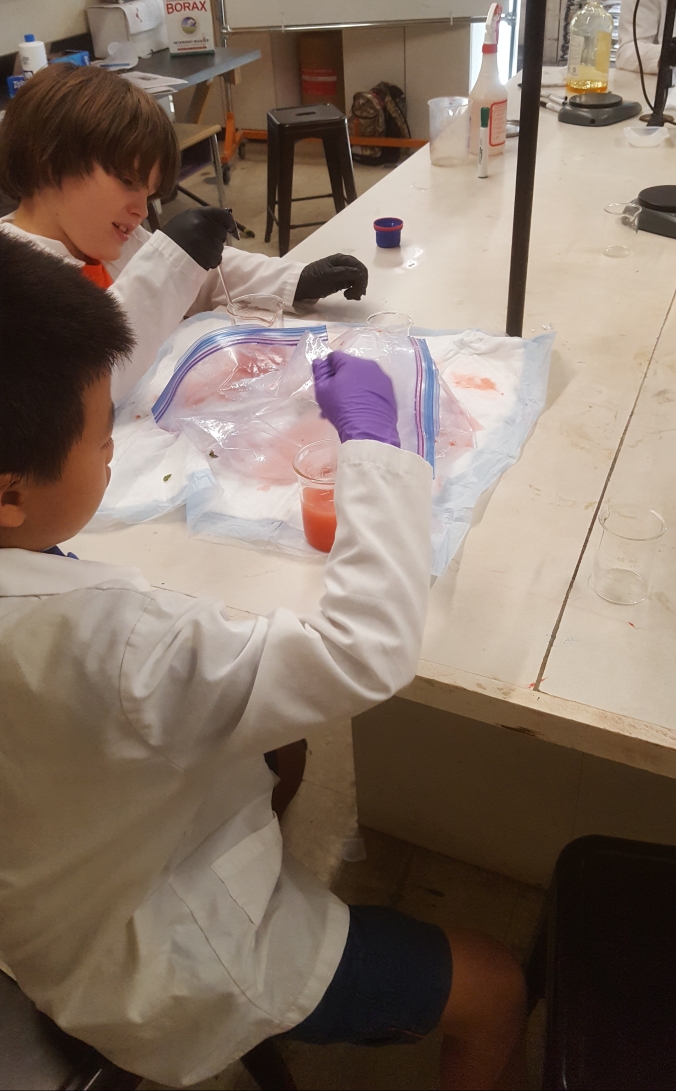
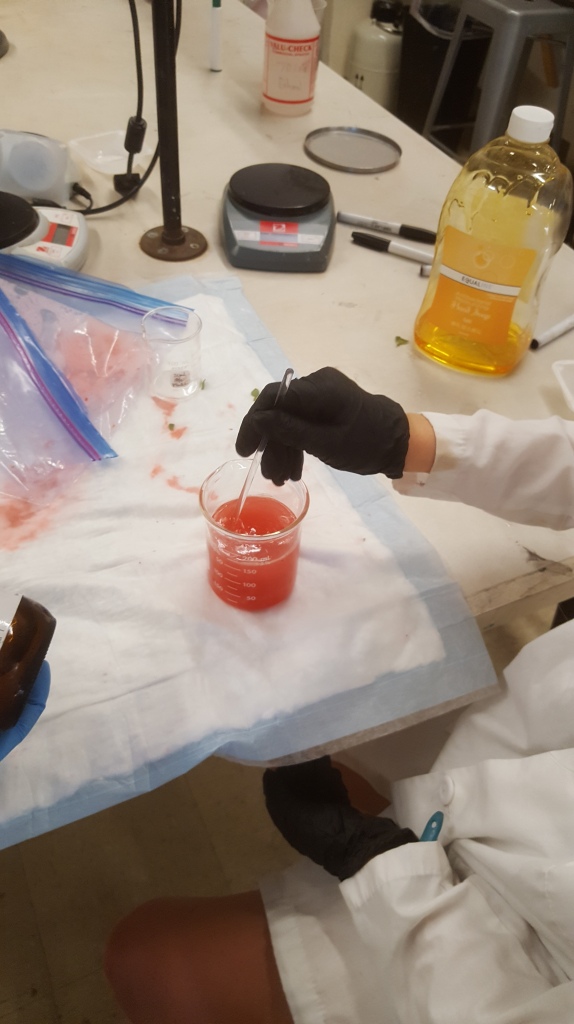
The question was posited: If we want to hold on pics, what should we do? The students immediately had plenty of ideas which included: emailing them to yourself with a predictable subject (ResultsDateInitials), uploading them to a labelled folder (DateResults) in Drive, Creating a Document called “LabResultsUnitNameDate”, and various iterations of that. After they all had a plan, they went to work, collected their results, and saved them. Some of them made sure to take pictures that showed the labels on the petri dishes to make it even easier for them. The entire module with talk and collection took about 20 minutes but now the students have a means to collect and keep information. I did a brief review of what we learned when we collected a second round of pictures but that was much quicker and it will eventually become a part of our routines.

I wrote earlier this year about executive functioning and the importance of thinking ahead and going through the process of planning backwards from goal to execution. This recap of GLP for record keeping is a good example of scaffolding that most students could use practice in, whether they have stellar EF skills or not. The students will all have to write about this experiment. They will all have to refer to pictures. They all now have a place where they can go to find that quickly saving them time and anguish. A nice bonus is that they shared their folders with me so I can access their photos if I need them (like for this blog post).

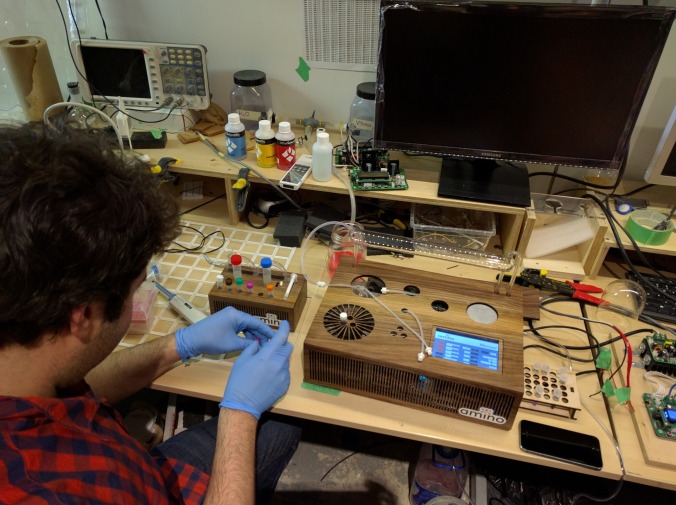
Next time, I will highlight how we cultured our pAcne in anaerobic conditions and how the entire unit will lead us into a discussion of microevolution and natural selection.

JNC OBI pAcne IN #2 3-22-2018 Photo 3

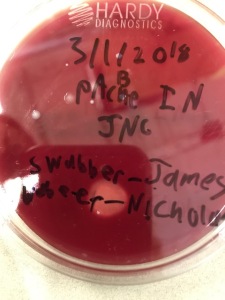
Clearly labeled and visible in pics

Continue reading

Introducing One Brave Idea

This year, Acera is presented with an opportunity to contribute to a landmark effort to combat  cardiovascular disease called One Brave Idea. A joint effort by the American Heart Association, Google Health, and AstraZeneca, OBI’s goal is to rethink how cardiovascular disease  is studied and treated. Together, the 3 companies awarded a $75 million grant to Dr. Callum MacRae, who is convening a diverse team of scientists across disciplines to study CV health and the earliest stages of disease.

Based on the premise that elementary and middle school populations provide a unique opportunity to discover longitudinal contributors to cardiovascular and metabolic wellness, Acera school is partnering with OBI. Over the next 3+ years, we hope to break new ground on our understanding of health and wellness in children and adolescents, and on how children can become active contributors to research, education and community engagement on cardiovascular health.

As a part of this project, I am developing and teaching a unit on skin microbiomes that will help us answer the following questions:

Can we develop a curriculum approach that enables Middle School students to successfully culture, sequence, and study their own skin microbiome in the lab, and make their findings reproducible and informative for research? Can we engage students in authentic learning on cutting-edge science in such hands-on ways, empowering them to develop a new sense of ownership in their own health? How do we explore how microbiome researchers collaborate with schools on such curricula as well as enroll students in broader studies?

To say that I am thrilled to be part of this innovative effort is an understatement.  Not only is it an amazing opportunity but it fits in perfectly with where I wanted to go academically. My goal over the last few years has been to design a fully hands-on, inquiry-driven, biology course that teaches the scientific theory in the national standards for learning, but in a way that is congruent to how research is performed in today’s biotech and academic worlds. This proposed skin microbiome unit will give students a chance to apply their knowledge of cell biology and genetics, and merge it with evolution and natural selection, all by studying one bacterial biomarker: Propionibacterium acnes or pAcnes, the bacteria that causes acne.

We got hooked on pAcnes — could there be a better candidate to get Middle Schoolers interested? — through our partnership with Tami Lieberman, Assistant Professor at the Institute for Medical Engineering and Science at MIT. Mentored by longtime Acera collaborator Eric Alm of MIT’s Alm Lab, Tami is starting a lab on facial skin microbiome research right now. Her recent work has involved looking at the transmission of pAcne and how it is able to colonize its hosts and evolve in response to a changing microbiome. She is highly interested in working with school populations, and shares our systems thinking approach: that there are important connections to be drawn between the microbiological specifics of p-acne strains and evolution, and adolescent culture and perceptions around acne, identity, and wellness.

At this point, I would love to delve into a lengthy discussion as to how pAcnes tie into cardiovascular health but I won’t because those links aren’t currently known; there is, however, emerging research that suggests they do exist. This presents an interesting opportunity for students to investigate a new field of study in which the “answers” aren’t known. In other words, this experience will allow them to act as researchers where their results can potentially help scientists and doctors develop a link between the somewhat mysterious skin microbiome and CV health. As a part of this project, I am developing a hands on module to teach natural selection that fits into other modules I have developed.

Working with Tami, we will be studying the natural selection and evolution of pAcnes. The bacteria is able to mutate as it colonizes its host; by comparing intra- and interpersonal isolates (cultures), scientists can trace its evolutionary lineage and investigate which pAcne genes may be used to help this process. There are plenty of dry lab modules that teach about classical natural selection but there is a dearth of wet labs available for this discipline.

To get to this point, the students spent the first half of the year working with CRISPR or RNAi systems, learning about cell biology and the central dogma of molecular biology (DNA encodes RNA, RNA encodes protein). These units also allowed students to develop  the basic molecular biology skills including micropipetting and following kit-based procedures in a biochemical assay to purify reaction products (e.g. genomic and plasmid minipreps, agarose gel extraction kits, sensitive enzymes).

We used the Odin CRISPR or Carolina RNAi kits and retrofitted them to include additional negative controls and altered the experimental timelines to match our class schedule. These kits also allowed us to review transformations, sterility techniques, and the importance of selective media preparation. Some of my upper level groups also performed basic statistical measurements including averages, standard deviation, basic tests, and data interpretation through table and bar graphs. We also discussed documentation methods such as how best to save pictures from experiments so that we can easily access them when it’s time to write the lab report. Finally, we sent out purified PCR products from the RNAi experiments for Sanger sequencing and next, we will perform basic BLAST searches comparing mutant and wild type variants in the coming weeks.

I have wanted to do a project like this ever since I started teaching. I really enjoyed my decade as a working scientist and my long time goal has been to teach kids what it’s really like to be in that world. So few understand that world and my hope is that my students all know a bit about what the day to day life of a scientist is like. This project also presents an opportunity for students to have their work go beyond the walls of our school and potentially help scientists on the front lines of health and tech. We are all very excited and I will be blogging my exploits on here.

Lab Science and Executive Functioning

20171013_142542

When I first learned about executive functioning (EF), I was skeptical as at first glance, it sounded like another ephemeral educational buzzword that lives and dies in PD sessions. Thankfully, I was quickly turned and realize that EF is a crucial skill that all students need practice with and that hands on science can serve as a wonderful subject in which to learn and practice EF.

Understood.org has this to say:

Executive function is like the CEO of the brain. It’s in charge of making sure things get done from the planning stages of the job to the final deadline. When kids have issues with executive functioning, any task that requires planning, organization, memory, time management and flexible thinking becomes a challenge.

The way it was introduced to me was as such:

“What are you going to have for dinner?” – Immediately, your brain starts thinking ahead about what you have at your house, what you need to buy, and the times you need to procure, cook, and eat. So, a simple question caused a rush of neurological infrastructure to start thinking ahead to what you would need to solve a problem. We largely do this because as adults, we-hopefully-think and plan ahead but in kids with EF difficulties, this area of the brain hasn’t developed those skill sets. I always wondered why students forget to bring something to write with to class and are surprised they needed to bring one in the first place but as it turns out, a lack of EF skills could be the culprit. So, how can science help this? Easy! Being a scientist requires incredible amounts of thinking ahead, planning, and organization in order to plan, conduct, and analyze experiments.

Here is a link to a simple doc I made for a Vitamin C chemistry clock reaction for 4th and 5th graders with a few EF tags in it. Now this is by no means a complete EF work-up and I’ll expand on some ideas in this entry in subsequent entries but this doc does highlight one of my favorite EF lab tactics for lab procedures and that is thinking about the right tool for the job. Traditionally, teachers tend to put out beakers and equipment for this lab or give each group a set of tools. While this does save time, it does take away some of the inquiry of finding the right tools.

In the beginning of the year, in addition to normal lab safety, we workshopped the following ideas:

In the pictures you can see examples of the students worked stations which they designed into quadrants and boxes to organize their materials and keep them separate.

20170921_142352

Step 1: Make a vitamin C solution by crushing a 1000 mg vitamin C tablet and dissolving it in 60 mL of distilled water. Label as “vitamin C stock solution”.

I asked the students how they are going to crush the tablets. They suggested smashing it hammers, bricks, the bottoms of beakers and I asked them how they were ensure they recovered all of the powder. Then, one of them suggested a mortar and pestle and demo-ed why that will be useful for recovery. So we had that tool established and that wrote that in the materials box next to the step.

Next, we turned our attention to the 60 mL distilled water. Someone suggested a beaker but noticed that there was no 60 mL line and that getting exactly that amount was going to be logistically impossible. Another student said that graduated cylinders have that marking and it was determined that we should use those to measure out liquids to be precise. I also told them at the markers on beakers are only 95% accurate which convinced them further.

Then, we decided to look at various size graduated cylinders we have: 10 mL, 25 mL, 50 mL, 100 mL, 250 mL, and 500 mL. As a student suggested a size, myself or a student modeled it and we made some determinations about the various sizes:

250 mL and 500 mL: too big as it was hard to see where the 60 mL line

10 mL and 25 mL: too small as we would have to fill it multiple times. Since there is only one distilled water sink, it would take a long time for all the groups to cycle through.

50 mL: same problem but the students said they could use a 50 mL and a 10 mL GC and since we are only measuring water, we wouldn’t need to do any cleaning to get the proper amount so that was an option.

100 mL: Also, an option but the students said there could be a line as students fill and empty the GC to get the proper amount of water. Then, a student suggested filling the 100 mL GC to slightly above 60 and using a dropper back at the bench to get the specific amount. This was the option that a majority of the students went with but some opted for the 50 mL and 10 mL combination but also used a transfer pipette.

This seems like a lot of work for 1 step but after a couple experiments, it becomes part of the routine. Most importantly, it allows students to think ahead and place themselves in the experiment going through the steps in their own minds before rushing into the lab. EF skills are important in ensuring that students “mind map” a task and think ahead to the logistics of a project.

As we were creating a dialogue around equipment, I told them that at the beginning of my science tenure, I was frequently reprimanded by my bosses for what I realize now was poor EF skills. Then, one of my students raised their hand and asked why I just didn’t just create these dialogue boxes next to steps and think about data collection before the experiment like we are doing. That was a good question and I didn’t have a real answer aside from that doing so would have alleviated some headaches.

A lab environment is overwhelming for the student with EF difficulties and next time, I will talk about how to set up a work station on a benchpad that keeps equipment, chemicals, and notes separate and organize and how to utilize downtime in between steps to set up subsequent experiments

An Inquiry Driven Visualizing DNA Using Fruit

My goal for this year is to pop the hood on my teaching pedagogy and write about how to practically teach molecular biology. Over the next few months, I am going to be posting information about teaching common biological activities but in a more intuitive that makes the procedure less cookbook and more of an exploration. The first entry is about the very common practice of purifying DNA from fruit using simply household chemicals, a great starting point for the practice of molecular bio. Many students have done this but there are many different adaptions and add-ons one can do to the procedure in order to add elements of experimentation and mystery all while exploring the chemical properties of the DNA molecule.

Students tend to vary greatly in their overall knowledge of DNA and so it is important to ensure students understand what it is and provide a number of fast facts that will hook the student’s attention.

Talking Points to Build Interest Around DNA Prior to Purifying It

  • Each one of your cells has about 6 feet of DNA packaged inside. DNA is coiled around a complex of proteins called histones which tightly bond to the DNA and keep it condensed. Since this is an abstract concept to envision, envision a long of yarn wrapped into a tight ball. Unwrapped, it would stretch on for a hundred foot but when wrapped, it is easy to handle and takes up a lot less space
  • If one were to remove the DNA in each of their cells and line up the strands from end to end, it would stretch to somewhere between Jupiter and Saturn! Imagine spending months upon months in a space ship viewing the same person’s DNA the whole time. Wow!
  • Most of the attention DNA gets is from genes, the blueprints for proteins that students and scientists alike spend lots of time studying but that only accounts for a small percentage of the overall genome! The other sequences, called introns, have a fascinating story to tell as well.
    • Transposons are remnants of viruses that have implanted themselves in our DNA and are present in our evolutionary ancestors. During times of extreme cellular stress, some have the availability to catalyze their own removal and move to different places in the genome.
    • There are also psuedogenes, inactive copies of nearby genes that collect mutations at a higher rate than their functioning neighbors.
    • There are sequences that allow for intramolecular bonding that can be sometimes be millions of bases apart but loop together to find each other to allow for tighter packing. After all, 6 feet of DNA have to fit into a space far smaller than the head of a pin

Materials

Quart freezer bags
Fruit (strawberry works best but bananas and blueberries also work)
Shampoo
Salt
Meat Tenderizer
Soap
Plastic cups or beakers
wood or glass stir rod
Cold 99% Isopropyl Alcohol or Ethanol

Note: The most important piece of pre-experimental planning is to place the alcohol required for the last step of the process in a freezer. The DNA solubilizes in alcohol and chilling the alcohol enables the DNA to clump together faster as well as rise to the top.

Below is a common procedure for purifying DNA from fruit. Connections to other areas or experimental variations are in bold below the steps. 

  1. Remove the stem and place the strawberry in the bag and seal, ensuring that all the air has been removed from the bag

20170927_162228.jpg

  • Mathematics connection: Have the students weigh the strawberry and hypothesize what percentage of the total weight of it is represented by DNA.

2. Gently mush the strawberry ensuring that all chunks are broken into small pieces. No single piece of strawberry is larger than a couple of millimeters

  • Math/Physics connection: Why is it important to get the pieces as small as possible? Take a rough volume of the pieces and consider the importance of surface area in allowing reagents to reach their target. 

20170927_162142

3. Place 1 squirt of soap/shampoo along with 1/2 tsp salt or meat tenderizer into the bag and 25-50 mL of water into the bag and gently slosh around the slurry allowing the surfactants and

20170927_162554.jpg

  • Experimental design challenge: What effect would changing the amounts of  reagents have on the amount of DNA recovery? Students can change one variable at a time and see how that changes the overall DNA yield
  • Chemistry connection: Soap is required to break down the cell membrane, which is largely composed of lipids. Why is soap such a powerful degreasing agent? And why don’t our cells pop open when we use soap?
  • Biochemistry connection: Why is meat tenderizer used? Read the ingredient label and hypothesize which components of the tenderizer make the most different. 

    4. Allow the bag to rest for 10-15 minutes to allow the chemical reactions to proceed

5. Pour the contents of the bag into a coffee filter place on top of a beaker and allow the liquid containing the DNA to filter down into the beaker below. 

6. With the DNA solution in the beaker below, about 2-3 volumes of  COLD alcohol can be poured in. The results work best if the students are stirring their solutions as the alcohol is poured.

20170927_163929.jpg

The DNA should be stuck to the stir rod and the students can squeeze out as much of the water and alcohol as possible. If the students weighed the strawberry in the first step, they can weigh the DNA, on the stir rod and calculate what percentage of the total weight of the strawberry is taken up by the genetic material. 

20170927_163858

This process can be repeated with different fruits though their DNA is not as sticky as strawberries. This can make quantitative comparisons of fruit DNA more difficult but a qualitative observation is still possible.


History Connections to DNA in general

  • The discovery of DNA as the genetic material of the cell and its structure was filled with colorful scientists and characters. The research of Griffith, Avery, McCleod, Watson, Crick, and Franklin helped to prove the properties and structure of DNA. Their research and lives also demonstrated what science in the 1940’s and 1950’s ws like. The discovery of the double helix was a race between competing labs and while Watson and Crick published first, there were others. What were some of the other researchers studying DNA and what contributions to science did they provide?
  • While Watson and Crick get most of the credit for the discovery of the DNA double helix, Franklin’s work on elucidating its X-ray structure was paramount. For decades, her work was marginalized. What were the social circumstances around the role of women in science during that era and how has it changed?

In Celebration of “Why Not?”

This year has been all about molecular biology,  studying its possibilities and how scientists have used simple organisms to perform work on a cellular level. In November, we performed bacterial transformations where we shoved a plasmid into E Coli that enabled it to change color. Then, we performed restriction enzyme digests on a plasmid and inserted a gene that changed its color and enabled it to grow on antibiotic resistant media.  I gave the students an article on CRISPR prior to our last round of experiments to peak their interest in the potential of gene therapy. Fast forward a few months later when a new collaboration will have us doing CRISPR experiments in lab.


I was recently in a meeting with our outreach director talking about this project, and she asked me why I’m doing this.  I simply replied, “Why not?” But allow me to back up.


CRISPR is a breakthrough technology that is essentially a set of DNA scissors that can be directed to cut genes at certain points. CRISPR (which stands for Clustered Regularly Interspersed Short Palindromic Repeats) utilizes an enzyme called Cas9 that was originally found in bacteria to make the cuts and offers a potential opportunity to edit genes in vivo, enabling scientists to remove harmful genes that could at some point cause diseases like cancer. There are obviously a host of ethical and legal debates that can stem from this technology, but we will put those aside for now and focus on the project we are doing in lab.


Much of molecular biology in a lab setting involves utilizing organic macromolecules to perform work in cells, enabling scientists to see the effect that altering and manipulating pathways have on various levels of the cell (global and/or local). Practically, this gets done by adding small volumes of liquid containing sensitive reagents to other small volumes of liquid containing different sensitive reagents. The nice thing about these experiments is that if  students have performed one of these assays, they can basically perform a majority of all molecular biology assays, including CRISPR.


CRISPR is arguably the hottest area of biology right now. Do a google search for it and a litany of articles will pop up from a variety of non-industry sources. It seems that any news source worth their clicks has had an article detailing the many cool aspects of this emergent technology. Further, there is a nifty beginner CRISPR kit available on Odin, a great website/store for amateur scientists that sells an inexpensive molecular biology kit with the real reagents.


So, given its popularity, and given that my students have already done similar experiments, why not do this in the classroom?


For me, this is the fun part of doing deep dives into a given content area. By spending a while in a given field, it provides the opportunities to build the background necessary to do experiments that are going on in labs right now. Restriction enzymes were an extremely hot advancement back in the late 60’s,  and it took nearly 3 decades for them to appear in high school classrooms. With the products currently available and with the proper knowledge base, it is possible to have students learn about something that scientists are feverishly studying right now, which consistently excites curious minds.  Students are inevitably more engaged when they realize that the projects they are working on have concrete links to real world phenomena.


Since my students only meet with me for 2 hours a week, it has taken a while to get to this point, but it is quite feasible that a student can go from extracting DNA from strawberries to CRISPR in a matter of 4-6 weeks. If you are interested in learning how, I will be posting the unit plan summaries over the course of the next couple months.  


The Quest to Cut Vocab and Not Experience

I went to school for molecular biology for 6 years and then worked in the field another 7, so how do I distill down 13 years of jargon so that my middle schoolers will be able to do a transformation and understand the general process and how it goes down? I start with useful vocab that they need to be familiar with so they understand the procedure: competent cells, transformation, DNA, and a few others. Then, the reagents: Inoue Buffer, E Coli, ampicillin, plasmid. This way, the students can read through the manufacturer’s protocols and follow the procedure as well as understand the basic idea of how DNA works in concert with organisms. There are definitely details I leave out, but I can guide students toward them in post-lab or focus on them in other activities.

Apparently, there is a name for this. It’s called “just in time” learning, and it reminded me of the sort of thing I had to do in the workplace. A problem would arise regarding a certain pathway. Then, I had to research and understand the pathway using literature and find a way to problem solve by utilizing experimental design. Of course,” just in time learning” isn’t just limited to the sciences. It is useful to every field, and I love lessons where science can be used as a jumping off point into multidisciplinary areas. After all, no one concept is an island.

The key terms that I chose to concentrate on I deemed to be a reasonable entry point for the students who have some knowledge of general biology but lack a lot of the finer details. I planned a follow up lesson using DNA ligations to explore more about DNA, including some gritty details of its structure, such as the directionality of the backbone, an essential concept in understanding restriction enzymes, their mechanism, and their usefulness when working with DNA plasmids. By the end of that unit, my hope is that students will have worked with DNA enough so that not only the concept of genes, but of all of the things that work with things to make proteins, is emblazoned in their minds.

As the student’s lab reports are coming in, I will see how well they integrated the knowledge. The more advanced the students are, the more I expect to see ties into that theory, and my revisions for them will probe into the areas where the detail was scant or off. Making mistakes is the first step to fluency whenever one learns a new language, and molecular biology is just that.

img_4221

Microbiology for the Masses

One of the biggest problems with biology is that it requires a lab. Culturing bacteria, something that grows everywhere and over every surface on this planet, requires a great deal of complex incubation steps and manipulating it requires a shaker, 2 temperature specific water baths set to hot and cold, expensive pipettes and reagents, and various autoclaved sterile equipment. In order words, if you wanted to do this at home, you are looking at an investment of thousands of dollars and the loss of an entire room of your house.

That is now looking to change as there is a growing market of synthetic biology platforms- dubbed “garage biology”- that can enable people to do sophisticated biological research in their own home without the need for the expensive and space consuming equipment. Last month, I travelled up to Montreal to try one such platform and  felt that I held the future of science in my hands.


IMG_20160226_141036

In a robotics makerspace in the hip area of Saint Viateur, I experienced the Amino, an all in one platform for the growth, transformation and genetic manipulation, and propagation of bacteria that combines the rigor and specificity of a full scale lab with the convenience of a device that takes up little more space than a personal computer. As I was doing a bacterial transformation (the implantation of DNA into a bacterial target), I felt as if I knew how the mindset of those who tested the first PCs. After all, before the first PC, navigating a computer required a morass of complex and/or convoluted systems of commands. The PC simplified all that by taking away the levels of complexity and creating a user-friendly interface that all could enjoy. In other words, these are the same theoretical gains a budding scientist would experience by using the Amino platform.

IMG_20160226_141032

Performing a bacterial transfection sounds daunting but in theory, is a very simple concept. One simply starts by growing bacteria-usually a strain of Ecoli that is harmless to humans-in a small 37C dome located on the top of the amino. 37C translates to roughly 98.6F, or human body temperature. The process really commences when the bacteria is transferred via a simple plastic inoculating loop to a nutrient broth that is then placed in a tube well that has been pre-cooled to 19C. This puts an environmental stress on the bacteria causing it to release a set of proteins that allow it to adapt to the new temperature. Just when it equilibrates to the changes, the bacterial tube is transferred to a second well that has been heated to 42C at which point foreign DNA can be added. This part of the transformation is called heat shock and this sudden change of temperature causes the bacterial to open its cell walls allowing to take in material from the surrounding environment. After this, the transformed bacteria is injected in a growth tube by something as simple as a plastic transfer pipette.

IMG_20160226_130048

The heart of this whole experiment is the DNA that is added to this bacterial mixture. With the right DNA, it is possible to have a tube of microbes begin to produce a variety of things from flavor extracts to paint to simply growing more of a certain sequence for use in other experiments. There are a few additional steps to get it to this form but the removal of the bacteria and purification of the product is mostly built into the Amino. Adding in some basic PCR and molecular biology equipment can enable users to generate their own sequences to insert and really do sophisticated biology in their own home. Even further, these “cDNA” libraries can be shared with others to allow an open source biology platform across all Amino users.

The software for the Amino is based on Arduino which allows a number of external apps to interface and allow all manners of experimental readouts, many of which have not quite been explored yet but the potential is virtually limitless. The base unit does have it’s own very useful readout features and all of them can be viewed its own website where users can monitor the colony number, pH, and temperature of the reacting mixture. As the bacteria grows, there will be changes in all of these that denote colony health and there are countless experiments that can be designed to simply test how certain things affect microbial growth so adding cDNA isn’t even necessary to begin to exploring the magical tiny world of bacterial cells.

IMG_20160226_125339

Science teachers are often seen as gatekeepers of content but that is changing. Tools like the Amino will allow curious users to begin their own deep dives into microbiology and similar platforms are being developed that will allow individuals to explore concepts in biochemistry, organic chemistry, and even particle physics all using the garage technology platform! Until then, my students will be working to beta test the Amino and do their own investigations. They will have their own ideas, projects, and experiments to test and most certainly will have a multitude of questions regarding controls, methodologies, interpretations, and troubleshooting. So my role is less as a science “teacher” and more a “principle investigator.” Rather than opening the doors for students to learn, I remove the blockades that will help students learn and gain valuable experience so that in a few years, they can solve their own problems and help others with theirs.

Much ink has been spilled over the importance of student driven inquiry based models of learning and innovations like the Amino will help drive the science end of this. The creators of the Amino have had requests for the machine from all over the world. North America, China, France, and even schools in the Amazon Basin want it and from personal experience, I can see why!  As a research scientist, the idea that an elementary student can study biology the same way I did when I was in the tech realm is thrilling. After all, personal commuting got really exciting when it hit the garage so perhaps the same can be said for biology.

For more information on the Amino and how to contact them check out http://www.amino.bio!

Teaching The Chemistry of Electricity

As a fan of the Walking Dead, I often wonder what would happen if something catastrophic happened, and suddenly our power grids became non-functional. Would anyone happen to know how to generate power from chemicals using engineering or chemistry? For this reason and many more that are tied to teaching chemistry, I decided to explore electrochemistry and how the principles therein spawned batteries.

There is a lot there to explore – from electron behavior and their organization, all the way to redox reactions –  so we started the lab by talking about ions in general. A classic intro to electrochemistry experiments is to connect graphite plates to a battery and place them in various solutions to hydrolyze water. We talked about how the battery sends energy onto the graphite plates allowing water to be split into its individual elements, namely hydrogen and oxygen gas, which can be spotted by the bubbles produced. The students then compared the bubbling in a number of different solutions, both ionic and covalent. It was pretty easy to see that only the ionic salts were able to produce any significant amount of bubbling and thus had some kind of impact on the water. This led into a discussion of charge and the “ionization” of molecules in solution and of course, ionic bonds.


The last step I had them do was to connect their Daniell cells to a voltmeter so they could measure the voltage moving across the plates. I also asked them to switch the electrodes to see how the voltage changed so they could think about positive and negative voltages and its ties to whether or not a voltage can be generated spontaneously vs. non-spontaneously.

IMG_0218

Lots of good opportunities for practicing observational skills

The question of reaction spontaneity had been bandied about in a few other experiments, and this one was a part of an overall narrative on what makes a chemical reaction go. This is a question that the students ask me all the time. Normally this takes the form of feverish, excited questions about which combinations of chemicals would create the largest explosion, e.g “WHAT WOULD HAPPEN IF YOU COMBINE SULFURIC ACID AND HYDROCHLORIC ACID!?!?” (Answer: Not much…unless you add water or a base). We did a separate set of experiments that looked at various ionic solutions and their reactions with solid zinc in order to further demonstrate the nature of reaction spontaneity. This also led into a discussion of the activity series, a subject that was also broached in our Daniell cell experiments.

This set of experiments in electrochemistry represented over 2 months and well over 30 classroom hours. It got students thinking about a number of different chemical phenomenon, and all of them came out of these experiments with a general understanding of some or all of the following concepts: electrons, their orbitals, metals, reduction potentials, electricity, redox reactions, reaction spontaneity, and the activity series, all to varying degrees. In general, this provided a great introduction to many concepts that the students will explore more in high school. As an added bonus, if a zombie attack wipes out our power grids, they will have a basic knowledge of how to generate voltages using common materials!

The Importance of Food Labs

Kids love to eat, and they obviously love food, so it stands to reason that they love labs in which they can eat what they produce. After all, any science teacher can tell you that kids ask if they can eat lab materials ALL THE TIME. It doesn’t matter if it’s sugar or sulfuric acid, as long as it looks edible, the questions will fly. That is why it’s important to include food labs in the class repertoire and finally be able to answer “yes” when a student asks if they can eat a lab material.

IMG_1111

In response to the fact that we had been studying bacteria and how it grows, a student asked if we could make yogurt. Given that bacteria factor heavily into the yogurt production process, I realized this would be a great way to continue our exploration. We already saw the effects of bad bacteria, so why not focus on the useful parts of this gigantic kingdom of microscope creatures? After a very thorough cleaning of the lab and incubator using UV lights to ensure sanitary conditions, we began our deep dive into food production.

IMG_1034

We started off simply by using yogurt (greek or regular) as a base to grow in milk (whole, 1%, 2%, chocolate). The students realized quickly that the bacteria in the yogurt is going to reproduce at a pretty rapid rate, consuming the milk as it goes and doing whatever it does to produce the stuff that they know well and eat on a regular basis. One important experimental note I told them was that they had to boil their clean, newly purchased, “food safe,” beakers prior to each bacterial growth, as well as heating the milk up to 85C-90C. I didn’t expressly tell them it is to kill off bad bacteria; they looked that up for the post lab questions. Also, some students made the mistake of putting their yogurt in immediately after heating and were disappointed to discover that no growth had occurred within the yogurt. They quickly realized that they needed to cool the milk down so as to not kill the newly added bacteria, which was a valuable part of the scientific process.

For the follow up experiments, we looked at using a variety of different yogurt starters, each with slightly different bacterial compositions. The students researched the different strains to determine what the packets had it common and hypothesized the exact amounts of bacteria in each one. They performed a number of growth cycles looking at the effect of these starters and how they affected taste, consistency, and speed of growth of the yogurt, perfecting their protocols at each step.

Abby getting ready to consume said yogurt

Abby getting ready to consume said yogurt

I made sure not to give them too much of the story behind why yogurt is formed and allowed them to uncover the science behind it after the experiments. When we concluded the yogurt cycles, the students had a lot of questions as to what they had just done. I guided them toward a list of basic questions, which included, “What about the bacteria makes milk thicken when incubated?” The students uncovered pretty quickly that the bacteria eat the milk sugar (aka lactose) for food and produce lactic acid as a waste product, which changes the pH of the milk, degrading some of the proteins, and thus thickening the overall product. This is similar to the effect of acid on enzymes and goes along with the general acid-base studies we did earlier in the year, so we were able to use this as a summative exercise on important concepts we’ve covered throughout the school year. While I could say that this was my plan all along, I will admit it ended up being a very happy accident.

Next, we explored the production of cheese, which was also suggested by a student. We designed two basic types of cheeses: acid and rennet produced. In addition, we used a whole new set of bacterial starters designed for cheese. We started with acid-formed cheeses that use the same coagulation principles as yogurt to curdle milk, but under high heat the curds (mostly fats and protein) split from the whey (mostly sugar and some protein), which can then be strained to produce anything from farmer’s cheese to mozzarella. Rennet is an enzyme solution that breaks down lipid and protein structures in the milk resulting in many common aged cheeses, like cheddar, and ties together some concepts from our enzyme unit earlier in the year.

IMG_1030

We spent about 3 weeks exploring the production of cheese and looking at it from various scientific angles to see if the students could get a smoother texture, stretchier mozzarella, and all around tastier cheese by modulating the flavors with salt and other spices. Since most of the students were using recipes they found online, they also got practice in following directions and altering steps when time was a problem to see if that changed the overall structure of the cheese. By the end, many students were creating their protocols based on prior research, which really is the heart of proper experimental design.

The principles used to make the two foods are similar, and the students really enjoyed the exploration and the act of producing something at the end that was edible.  They also received important knowledge as to what is in their food and how science is used to create the things they like. I sampled most of the students’ work and suffice it to say that many of the creations were quite tasty. So not only can food labs be a treat for kids, but instructors as well, and since they all followed proper safety protocols, not one illness resulted. Overall, this was a great summative exercise to tie together many of the previous concepts we have studied over the past year.

A Deep Dive into Bacteria

There are so many ways in which studying bacteria is useful from an educational standpoint. It enables students to envision the lives and activities of the smallest and most ubiquitous forms of life on Earth and relate their activities to their own. All bacteria need to survive by getting resources, reproduce, and ward off prey. They also respond to stimuli, have a penchant for certain foods, and in our own bodies, outnumber our cells. Some after dangerous, some are innocuous, and all are mysterious given their microscopic size.

We started our adventure learning about bacteria by doing a quick web search to return general facts about them. I gave the students 20 minutes to uncover as many things as possible about them and then created a master list of bacterial informational. This included everything about reproduction to hand santizers to their ability to survive in space under the right conditions. After that, we began our first experiment by thinking about spices and the original purpose of spices in preserving food. I purchased 4 spices: cayenne, cumin, paprika, and black pepper. I gave the students a simple experimental goal and asked them to design an experiment to determine if spices inhibit bacterial growth.

I gave them petri dishes, glassware, agar, spices, and nothing else as the students looked up how to prepare the plates for the bacteria to grow. It was interesting for me to watch them struggle with things that as a scientist seemed second nature like how to dissolve the agar, how much of it to use, and when to apply the spices (in the agar directly vs. sprinkled on top). What resulted was a wide range of plates with different combinations of agar and spices. As a whole, they were all curious as to whether or not bacteria will grow and what it will look like. Several days later when they returned to lab, they saw that bacteria was growing on practically all the plates which disagreed with most of their ideas regarding how spices should inhibit bacterial growth. Some even saw growth on cayenne and cumin that looked like mold. As I told them, scientists can’t just assume that and that more analysis needs to be done so we saved those plants with the hope of purifying DNA and sending it out for sequencing.

For their follow up experiment, I wanted to them to mutate their bacteria. There are a great many ties to some very socially relevant problems regarding bacteria and drug resistance. I shared with them the case study of tuberculosis in Russia as a particular dangerous example (http://www.nature.com/news/russia-s-drug-resistant-tb-spreading-more-easily-1.14589). For this, I wanted them to take bacteria from their spice plates and replate it with various substances added that may confer resistance such as ethanol.

We’ve discussed ethanol in various capacities regarding their antiseptic abilities. They all know that it and isopropanol are used in products like Purrell that boast of killing 99.99% of bacteria. We discussed what that actually means and that if a trillion bacteria exist (a likely scenario for most surfaces), there are still millions that survive possibly with something genetic that will enable them to propogate back to their original numbers within a matter of days or even hours. Indeed the students saw that ethanol didn’t seem to inhibit growth when growth was stretched out for a long period of time and in a couple cases, encouraged growth. This was a truly fascinating thing to witness and taught them a valuable lesson regarding the life cycle and adaptability of bacteria.

Our final experiment consisted of our first steps in classifying bacteria with a simple gram stain. This tests for the presence of a carbohydrate called lipopolysaccharide, a molecule that helps bacteria to resist antibiotics. Some strains have it and others do not and through a series of dyes, the LPS containing bacteria are revealed colorimetrically. For the first time in this series of tests, I gave them an exact protocol. At first glance, following protocols seems counterinuitive to creativity but the ability to follow steps and get a result is extremely important to life. After all, when one is putting together furniture, it’s probably not a good idea to skip or veer from the steps. In addition, getting a result is not the same as getting a prescribed one and most students saw mostly gram positive but also several colonies of gram negative. This showed students that different types of bacteria were growing in their cultures. Ideally, we would have loved to sequence all the bacteria but unfortunately, DNA sequencing is still an expensive endeavor when done with many samples.

This series of experiments provided a valuable introduction to bacteria, their life cycles, and ability to survive and thrive in a variety of conditions. By doing this, we took the microscopic and brought it out to be seen by the naked eye so that we may truly see life on the smallest scales up close.